


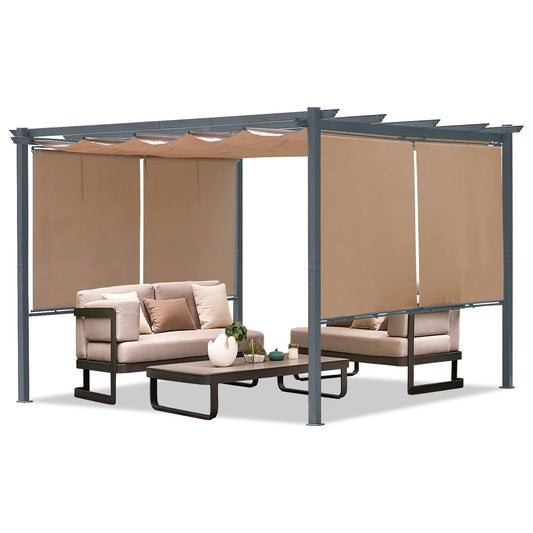
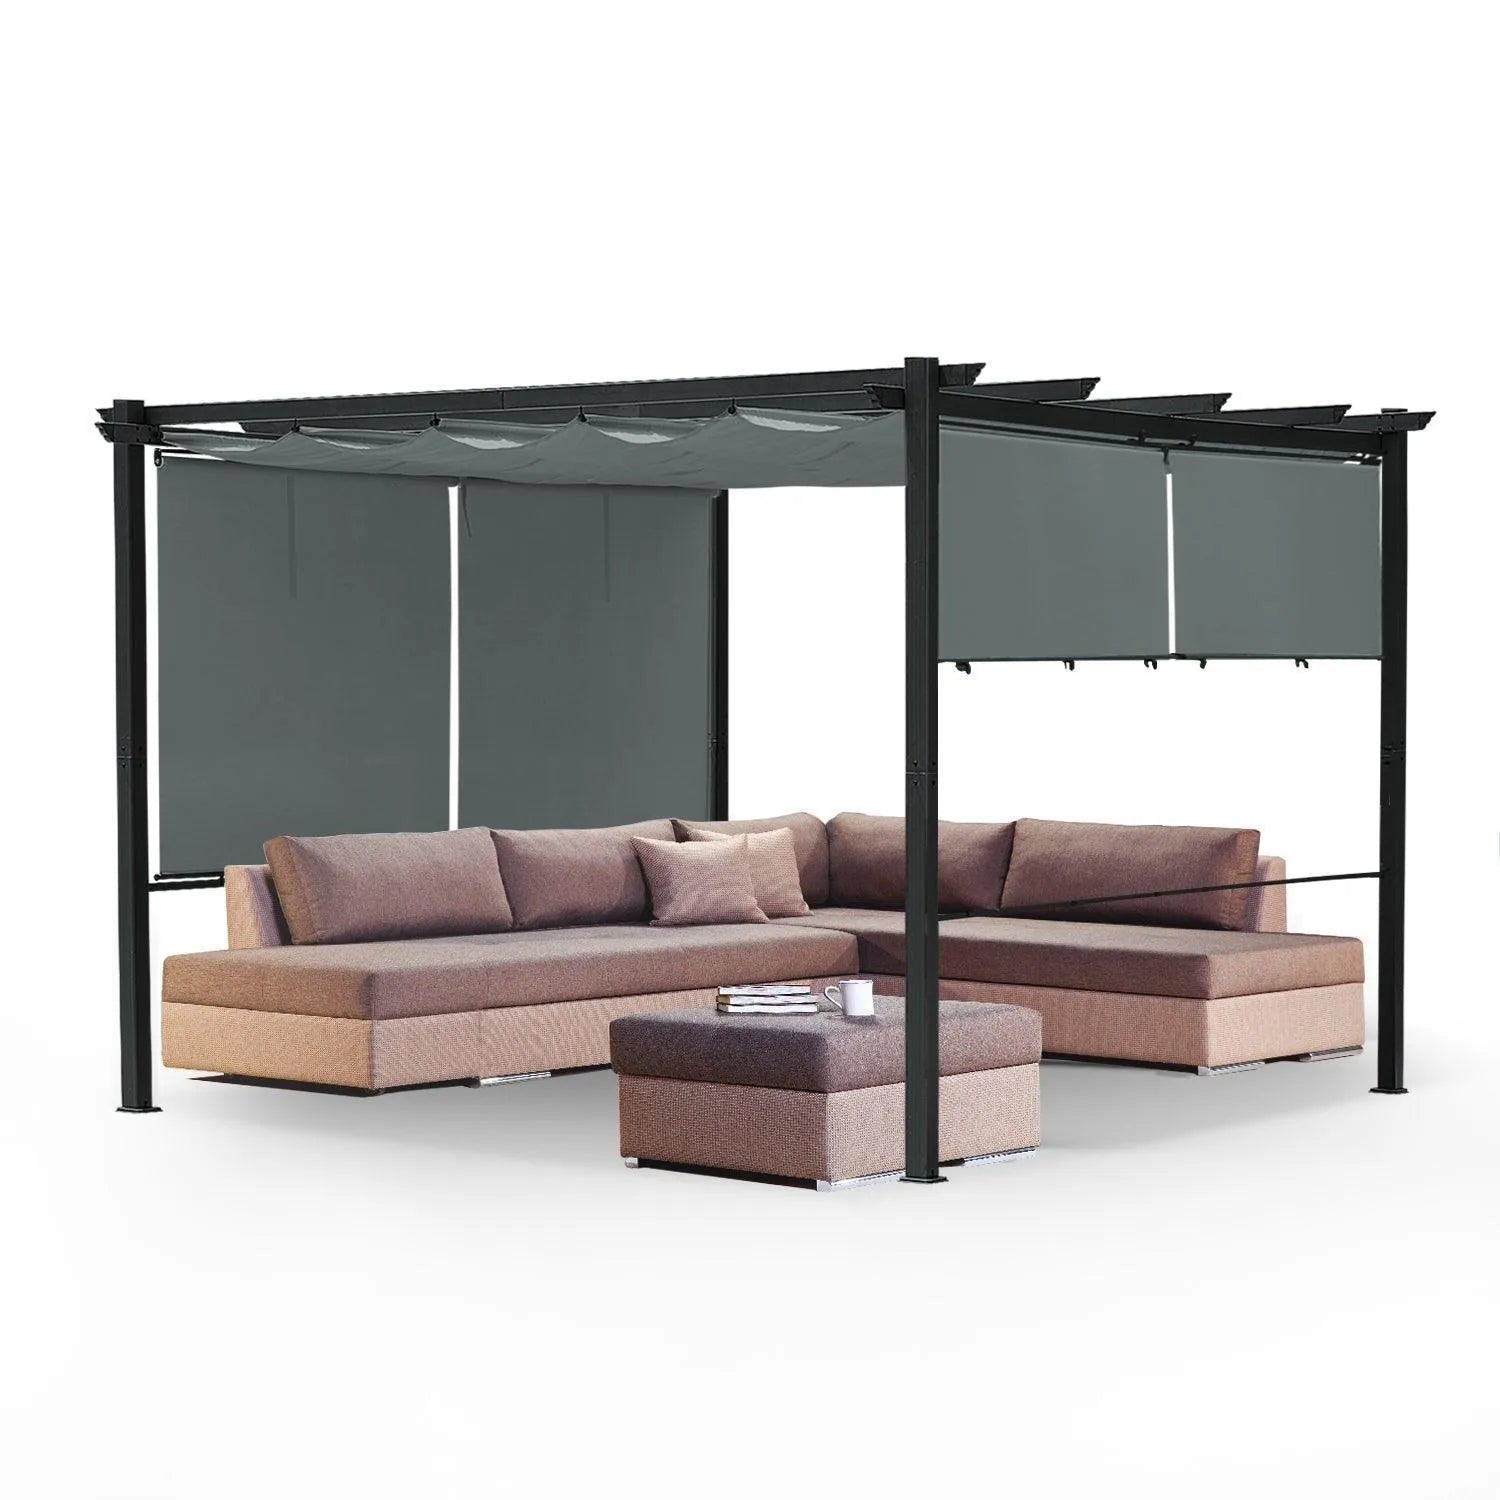


A pergola attached to house connects directly to your home's exterior wall using a ledger board, fascia mount, or roof raiser bracket. It uses only two freestanding posts instead of four, creates seamless indoor-outdoor flow, and costs 10 to 20 percent less than a freestanding model. Proper flashing and structural anchoring are critical for long-term safety.
Adding a pergola attached to your house is one of the most effective ways to extend your living space outdoors without a major renovation. Unlike a freestanding model, an attached pergola borrows your home's structure as one side of its framework, making it more affordable, more visually integrated, and more impactful for smaller yards. This guide covers everything you need before the first drill goes in: the pre-build checklist, three attachment methods, step-by-step installation, materials, common mistakes, and how to decide between DIY and a ready-to-install kit.

Why Choose a Pergola Attached to Your House?
For most homeowners with a patio or deck directly adjacent to the house, an attached configuration simply makes more sense than going freestanding. The structure becomes an architectural extension of the home rather than a separate object in the yard, and the practical advantages stack up quickly once you start comparing the two options side by side.
Indoor-Outdoor Flow and Space Extension
A pergola connected to house creates a covered transition zone between your interior living space and the outdoors. With the right placement over a backdoor patio, sliding glass door, or deck, it effectively adds a shaded outdoor room that feels like a natural continuation of your home rather than an afterthought. This seamless indoor-outdoor connection is one of the top reasons homeowners choose an attached design over a freestanding one.
Cost Advantage Over Freestanding Models
Because one side of the structure is supported by your house wall, a pergola attached to house requires only two freestanding posts and two concrete footings instead of four. That reduction in materials and labor typically translates to a 10 to 20 percent cost savings. For a mid-range 10x12 project, that can mean $500 to $1,000 back in your pocket before you spend a dollar on finishes or accessories.
Curb Appeal and Home Value
A well-installed attached pergola improves the visual proportion of a home's exterior by adding architectural depth and shadow lines to what is often a flat, featureless wall. Real estate professionals consistently cite functional outdoor living spaces as a value driver, and an attached pergola signals a designed, cared-for property. A quality installation typically recoups a significant portion of its cost at resale.
Before You Build: A 5-Point Pre-Build Checklist
The most common attached pergola projects that go wrong do so because of skipped preparation, not poor workmanship. Running through these five checkpoints before purchasing a single board or bracket will save time, money, and stress once the project is underway.
|
Step |
What to Check |
How to Do It |
Why It Matters |
|
1 |
Building permit requirement |
Contact local building dept. before starting |
Attached structures are often classified as home additions |
|
2 |
Wall type and surface |
Identify wood framing, brick, stucco, or vinyl |
Determines attachment method and hardware needed |
|
3 |
Wall structural integrity |
Inspect for rot, damage, or soft spots |
A compromised wall cannot safely carry ledger loads |
|
4 |
Underground utility lines |
Call 811 (US Dig Safe line) before digging |
Prevents dangerous contact with buried pipes and cables |
|
5 |
HOA rules and setback requirements |
Review HOA CC&Rs and local setback codes |
Avoids post-build disputes, fines, or forced removal |
Complete all five steps before purchasing materials. Permit and wall type checks in particular will shape every other decision in the project, including which attachment method to use and what hardware to buy.
Do You Need a Permit for a Pergola Attached to Your House?
In most US jurisdictions, yes. Once a structure shares a ledger board with your home's exterior wall, building departments typically classify it as a structural addition rather than an accessory structure. That triggers a permit requirement in the majority of cities and counties, regardless of size. The permit process usually requires a site plan showing setbacks, a structural plan for the ledger connection, and an inspection after framing. Skipping this step can result in fines, mandatory removal, and complications when selling your property.
3 Ways to Attach a Pergola to Your House
Not all attachment situations are the same, and the right method depends heavily on your wall type, the height of your attachment point, and how much structural load the pergola will carry. Here is a direct comparison of the three standard approaches used by contractors and experienced DIYers across the US.
|
Method |
Best For |
Pros |
Cons |
Skill Level |
|
Ledger Board |
Wood-framed walls (most common) |
Strongest connection, industry standard |
Requires flashing, stud location |
Intermediate |
|
Fascia Board Mount |
When wall attachment is impractical |
Cleaner look, no wall penetration |
Less structural strength, limited load |
Intermediate |
|
Roof Raiser Bracket |
Low-clearance or second-floor deck areas |
Versatile placement, no ledger needed |
Higher hardware cost, advanced planning |
Advanced |
Ledger board attachment is the right choice for the vast majority of residential projects on wood-framed homes. Fascia and roof raiser methods are specialist solutions for situations where direct wall attachment is not possible or practical.

Ledger Board Attachment
The ledger board is the industry-standard method for attaching a pergola to house framing. A pressure-treated 2x8 or 2x10 board is lag-bolted directly through the exterior siding into the wall studs behind it. The ledger carries the full load of one side of the pergola's beams, transferring that weight into the home's structural framing. The two critical requirements are finding the studs accurately before drilling and installing proper flashing above the board to prevent water intrusion.
Fascia Board Mount
When the attachment point is under a roof overhang or the wall surface makes direct fastening impractical, a fascia mount attaches the pergola to the fascia board at the roofline rather than to the wall itself. This approach is cleaner visually because it avoids penetrating the main wall surface, but it places load on the fascia framing, which is not always engineered to carry significant weight. Before using this method, confirm with a contractor or structural engineer that your fascia can handle the planned load.
Roof Raiser Brackets
Roof raiser brackets are steel hardware pieces that allow a pergola beam to cantilever out from a post or existing structure without a direct wall attachment. They are most common in situations where the attachment height is too low for a comfortable headroom clearance or where a second-floor deck makes ledger access difficult. The hardware cost is higher than a standard ledger setup, and the installation requires more precise planning, but the result is a structurally sound connection without touching the exterior wall.
How to Attach a Pergola to Your House: Step-by-Step
The steps below follow the ledger board method, which applies to the majority of wood-framed US homes. If your home has a brick, stucco, or vinyl exterior, see the wall compatibility section further down for hardware adjustments specific to your surface type.
Step 1: Mark the Ledger Height and Locate Wall Studs
Start by deciding the finished height of your pergola and marking a level horizontal line on the exterior wall where the ledger will sit. Use a long level or laser level to keep this line perfectly horizontal across the full width of the planned structure. Once the line is marked, use a stud finder to locate and mark each wall stud behind the siding. Ledger lag bolts must go into studs, not just siding or sheathing. Typical stud spacing is 16 inches on center, but verify this before drilling.
Step 2: Install and Flash the Ledger Board
Cut your ledger board to length and pre-drill pilot holes aligned with each stud location. Before fastening, cut back the siding along the ledger line to expose the house wrap or sheathing underneath. Position the ledger against the wall, ensuring it sits on the sheathing rather than the siding, and drive 1/2-inch lag screws through the ledger, sheathing, and into the studs. Use two lag bolts per stud for maximum pull-out resistance. Once the ledger is secure, install flashing immediately.
Step 3: Waterproof and Flash the Ledger Connection
Flashing is the single most important detail in any pergola attached to house installation. Without it, water runs behind the ledger board, saturates the wall sheathing, and causes rot that can spread into the framing over years. Start with self-adhesive flashing tape applied to the wall above the ledger line, lapping over the top edge of the board. Install a metal drip cap over the tape, tucked under the siding above. Finally, apply a continuous bead of exterior-grade caulk along the top edge of the ledger where it meets the wall. Leave the bottom edge of the ledger open for airflow and drainage. Never seal the bottom, as trapped moisture is worse than exposed moisture.
Step 4: Set the Support Posts and Footings
With the ledger secured, mark the post locations on the ground at the opposite end of the pergola. Dig footing holes to the depth required by your local building code, which is typically a minimum of 24 inches in most US regions and 36 to 42 inches in frost-prone areas. Pour concrete footings, set post anchor hardware while the concrete is wet, and allow a full 24 to 48 hours for cure before loading the posts. Once set, position your posts in the anchors, check plumb on two adjacent faces, and brace temporarily until the beams go in.
Step 5: Attach Beams, Rafters, and Secure All Connections
Set the main beam on top of the posts and secure with structural post caps. Run the rafters from the top of the beam to the ledger board using joist hanger hardware at the ledger end. Space rafters at 16 to 24 inches on center depending on your design and load requirements. Once all rafters are in place, add purlins perpendicular to the rafters to complete the overhead grid. Do a final walk-through tightening every lag bolt, checking all joist hangers, and verifying the structure is level and plumb before calling it done.
If you prefer to skip the build entirely, Aoodor's wall-mounted pergola collection includes ready-to-install aluminum models that attach directly to your home with standard hardware, no custom cutting required.

5 Common Mistakes When Attaching a Pergola to a House
Most attached pergola problems show up months or years after installation, not during the build itself. These are the five mistakes that account for the majority of structural failures, water damage claims, and permit issues experienced by US homeowners.
Skipping the Permit
It is tempting to treat a pergola attached to house as a simple DIY project that falls under the radar, but in most jurisdictions it does not. Building departments consider the ledger-to-framing connection a structural modification to the home. Installing without a permit can result in a stop-work order, a fine, and a requirement to demolish and rebuild to code. More practically, an unpermitted attachment can surface during a home sale and delay or kill a transaction.
Not Finding Studs Before Drilling
Lag bolts driven into siding and sheathing alone will pull out under load, especially wind uplift loads. The ledger must be fastened into the structural wall studs behind the sheathing. Use a quality electronic stud finder and verify each location by driving a small pilot hole first. If studs are inconsistently spaced due to windows or other framing, consult a contractor before proceeding.
Skipping or Rushing the Flashing
Water intrusion behind the ledger board is the leading cause of long-term structural damage on attached pergolas. Many homeowners install the ledger correctly but skip the flashing because the pergola roof is open and they assume rain cannot get behind the board. It can, particularly in wind-driven rain, and once it does, the damage is silent and invisible until rot is well established. Always install flashing tape, a metal drip cap, and caulk on the top edge before considering the installation complete.
Footing Depth Below Frost Line
In climates with freezing winters, footings that do not extend below the frost line will heave seasonally as the ground freezes and thaws. Even a half-inch of movement per cycle works fasteners loose over time and can visibly tilt the structure within a few years. Check your local frost depth, which ranges from zero in the Deep South to 48 or more inches in northern states, and dig accordingly. Your local building department will have the required depth for your area.
Using the Wrong Hardware for Your Wall Type
Standard lag bolts work well in wood-framed walls but are inadequate for brick, block, or concrete. Masonry requires epoxy anchors or sleeve anchors rated for structural loads, and the installation technique is completely different. Using the wrong hardware in masonry often results in a connection that feels solid at first but fails gradually under cyclic loads. When in doubt about your wall type and the right hardware, consult a structural engineer or experienced contractor before the ledger goes up.

Choosing the Right Material for Your Attached Pergola
The material you choose affects how long your pergola lasts, how much time you spend maintaining it, and how well it holds up in your specific climate. The four options most commonly used for residential attached pergolas in the US each come with a distinct set of trade-offs.
|
Material |
Lifespan |
Maintenance |
Best Climate |
Cost Range |
|
Cedar Wood |
15 to 25 years |
Seal every 2 to 3 years |
Dry regions |
$25 to $35 per sq ft |
|
Pressure-Treated Pine |
10 to 20 years |
Stain annually |
Most climates |
$15 to $25 per sq ft |
|
Aluminum |
20 to 30+ years |
Minimal, occasional wash |
All climates, coastal areas |
$20 to $40 per sq ft |
|
Vinyl |
20 to 30 years |
Wash only |
Humid regions |
$15 to $25 per sq ft |
Aluminum is the lowest-maintenance option and the best choice for coastal or high-humidity climates. Cedar offers the warmest aesthetic at a mid-range price but requires consistent upkeep. Pressure-treated pine is the most budget-friendly starting point for a DIY wood build.
For guidance on sizing your attached pergola correctly relative to your home, see our guide on ideal pergola height for US homes.
DIY Build vs. Pergola Kit: Which Is Right for You?
Building from scratch gives you full design control but demands significant time, skill, and tolerance for trial and error. A pre-engineered pergola kit trades some customization for a dramatically faster, more predictable installation. For most homeowners without advanced carpentry experience, a kit is the more practical path to a finished, structurally sound result.
|
Factor |
DIY Build from Scratch |
Ready-to-Install Pergola Kit |
|
Cost |
Lower material cost, higher time investment |
Higher upfront, all hardware included |
|
Time |
2 to 4 weekends for most projects |
1 to 2 days for most kits |
|
Skill required |
Intermediate to advanced carpentry |
Basic tools, beginner to intermediate |
|
Customization |
Fully custom dimensions and design |
Limited to available sizes and styles |
|
Best for |
Experienced builders, non-standard layouts |
Most homeowners wanting reliable, fast results |
If your primary goal is a functional attached pergola within a reasonable timeframe and without advanced carpentry skills, a pergola kit delivers better outcomes for most homeowners. DIY from scratch makes sense when you need custom dimensions or have the experience to manage a multi-week structural project.
Aoodor's wall-mounted pergola range includes aluminum options engineered specifically for house attachment, with hardware and instructions included.
For anchoring guidance specific to your post configuration, our article on pergola anchor requirements and building codes covers footing specs, wind ratings, and code compliance in detail.
Wall Surface Compatibility: What Works With Your Home's Exterior
The exterior surface of your home determines which hardware you need, how much additional prep work is involved, and whether you need specialist input before proceeding. Getting this wrong is one of the most common causes of attachment failure in DIY pergola projects.
Wood Siding and Wood-Framed Walls
Wood-framed walls with wood, fiber cement, or lap siding are the easiest and most forgiving surface for a pergola attached to house installation. Standard 1/2-inch lag screws driven into studs provide excellent pull-out strength, and the flashing process is straightforward. Cut back the siding to expose the sheathing behind the ledger, install flashing tape and drip cap, then fasten the ledger directly to the sheathing and studs. This is the scenario most how-to guides assume, and it is the most common situation in US residential construction.
Brick and Masonry Walls
Brick and concrete block walls require masonry-specific hardware. Standard lag bolts will not develop adequate holding strength in masonry. Use either epoxy anchors, which inject adhesive into a drilled hole for the highest load capacity, or expansion sleeve anchors rated for structural attachment. Drill into the mortar joints rather than the brick face wherever possible, as mortar is easier to repair if the anchor ever needs to be removed and creates a more consistent holding environment. Allow epoxy anchors to cure fully before loading the ledger.

Stucco and Vinyl Siding
Stucco is brittle and can crack during drilling if not approached carefully. Use a carbide-tipped masonry bit and apply steady, moderate pressure without hammering. The ledger fasteners still need to reach wood framing or a masonry backup behind the stucco, so confirm what the backing material is before drilling. Vinyl siding presents a different challenge: it expands and contracts significantly with temperature, and fasteners through vinyl alone have almost no structural value. Always penetrate through the vinyl to the sheathing and framing behind it. Use vinyl-compatible caulk at all penetrations to prevent moisture entry.
For a broader comparison of outdoor structures and how attached pergolas fit into the landscape design picture, see Pavilion vs. Gazebo vs. Pergola: Your Ultimate Guide. If you're working with a smaller patio alongside your house, our guide on smart furniture layout ideas for compact patios covers how to proportion a pergola within a tighter outdoor space.
FAQ: Pergola Attached to House
These are the questions homeowners ask most often when planning their first attached pergola project.
How do you attach a pergola to a house without damaging the wall?
Fasten a ledger board into wall studs, not just siding. Install flashing tape and a drip cap above the board, then caulk the top edge to seal against water intrusion.
Does a pergola attached to a house require a permit?
Yes in most US jurisdictions. Building departments classify a ledger-connected structure as a home addition. Contact your local building department before starting to confirm requirements for your address.
How much does it cost to build an attached pergola?
Typical cost ranges by path:
- DIY wood build: $1,500 to $4,000 in materials
- Pre-engineered aluminum kit: $800 to $3,000
- Professional installation: add $1,500 to $3,000 in labor
Can you attach a pergola to a brick house?
Yes, but standard lag bolts will not hold in masonry. Use epoxy anchors or structural sleeve anchors drilled into mortar joints. Consult a structural engineer for heavier pergola loads.
What size ledger board do I need?
A 2x8 pressure-treated ledger is the standard minimum. Larger spans may need a 2x10. Use hot-dipped galvanized or stainless steel fasteners to prevent corrosion at the wall connection.
Is it better to attach a pergola to the house or keep it freestanding?
Attached suits patios directly against the house where seamless flow and lower cost matter. Freestanding suits placements away from the wall or when you prefer no structural wall modification.
How do I prevent water damage where the pergola connects to the house?
Follow these four steps at the ledger connection:
- Apply self-adhesive flashing tape to the wall above the ledger
- Install a metal drip cap tucked under the siding course above
- Seal the top ledger edge with exterior caulk; leave the bottom open for drainage
- Inspect annually and recaulk if cracking or separation appears
Ready to Add an Attached Pergola to Your Home?
A pergola attached to house is one of the most rewarding outdoor projects a homeowner can take on, combining genuine structural function with a dramatic improvement to how the back of your home looks and feels. With the right attachment method, proper flashing, and compliant footings, it will serve you for decades. Whether you go the full DIY route or choose a ready-to-install aluminum kit, the planning steps in this guide apply.
Browse Aoodor's full pergola collection or go straight to our wall-mounted models for options engineered specifically for house attachment.

